Is Your Ancestor Hiding in a Census for the Deceased?
Did you know that there are census records that list individuals who died in the United States during certain years? I am excited to help you learn about this fantastic source of death records while also explaining its limitations. So, what is it and how do you find it? I am referring to:
UNITED STATES MORTALITY SCHEDULES

Have you ever discovered an ancestor who died just before a census and wished so badly that they could have hung on a little longer so you could have accessed more about them? That predicament is incredibly frustrating if you don’t know who their parents were, and the person died prior to the 1880 census, which asked for their parents’ place of birth.
Or was there a family member in one census that doesn’t appear on the next? If so, mortality schedules may help!
The U.S. Federal Government took mortality schedules in conjunction with the following censuses:
1850, 1860, 1870, and 1880.
The 1890 Veteran Mortality Schedule is also available for many states.
If you are lucky enough to be researching an ancestor from Colorado, Florida, Nebraska, New Mexico, North Dakota, or South Dakota, then you also have access to a bonus mortality schedule from 1885.
(These states participated in an interdecennial census to provide the federal government with specific information for administrative decisions on industry and agriculture, etc.)
Some states also performed mortality schedules with their state censuses in the years 1855, 1865, 1875.
The history behind these rare death records:
While collecting population data, census enumerators asked if anyone in the home had passed away during the previous year. More specifically, they recorded deaths that occurred in the twelve months before the census between June 1 (of the prior year) to May 31 (of census year). It is important to understand that not all deaths from 1849, 1859, 1869, and 1879 are available.
Deceased person’s information, including the cause of death, was collected into a separate entry than the population census. One of the reasons this resource is so invaluable is that most states did not record vital death records at that time. In fact, some states didn’t collect death records until 60 years or more after these mortality schedules. You can see how this resource is a rare treasure for a family historian. Here is a summary of all of the information you can gather from a mortality schedule:
Mortality Schedules
- Name
- Sex
- Age
- Race
- Marital status
- Place of birth
- If widowed
- Occupation
- Month of death
- Cause of death
- Duration of illness (in days)
- Parents’ birthplace (1870 & 1880)
- How disease was contracted (1880)
- How Long the Deceased had been a resident of the county of death (1880)
- Physician (1880)
Where are these records held?
Many mortality schedules are online; however, they may not come up in record “hints” on your family tree and typically require a specific search because they may not be indexed. Don’t let this deter you! This tutorial will show you how easy it is to find them!
Many counties or state archives have indexed lists of these rolls. If your ancestor’s name is on one of those lists, you can then do an additional search to access the actual record. The number of deceased persons per county typically wasn’t extensive, so finding your ancestor in the image collection is not a difficult process. There may only be a few pages to look through, depending on the location.
How to access these invaluable records:
Ancestry.com
Instructions: The link above will take you to the collection. Use the search fields to input ancestors’ names, ages, and locations. Sometimes, less information is more, so it may be more effective to search by only the surname and place. That way, if the record has first name initials or misspellings, it won’t restrict the search. Using various spellings of a name is always a good idea!
Limitations: The collection does not include every state or year. Use the toggle on the right-hand side of the page to see what states/years are available. If you don’t locate the recordset you need, try one of the next two options.
New Horizon Genealogy
- Mortality schedule lists by state [Click here]
Instructions: Click on the link and select the state you want from the menu. Then select the county and year. Those links will then redirect you to county pages and websites where mortality indexes are listed online. This is a very helpful resource!
Limitations: There are some notes which say there are no available online records for specific locations. However, with millions of records added all the time, this may not be accurate. I have found several mortality schedules for those “missing” states on FamilySearch through image-only collections (not indexed) or digitized books (indexed). If you run into one of those messages, try using the next step to look for the records.
FamilySearch
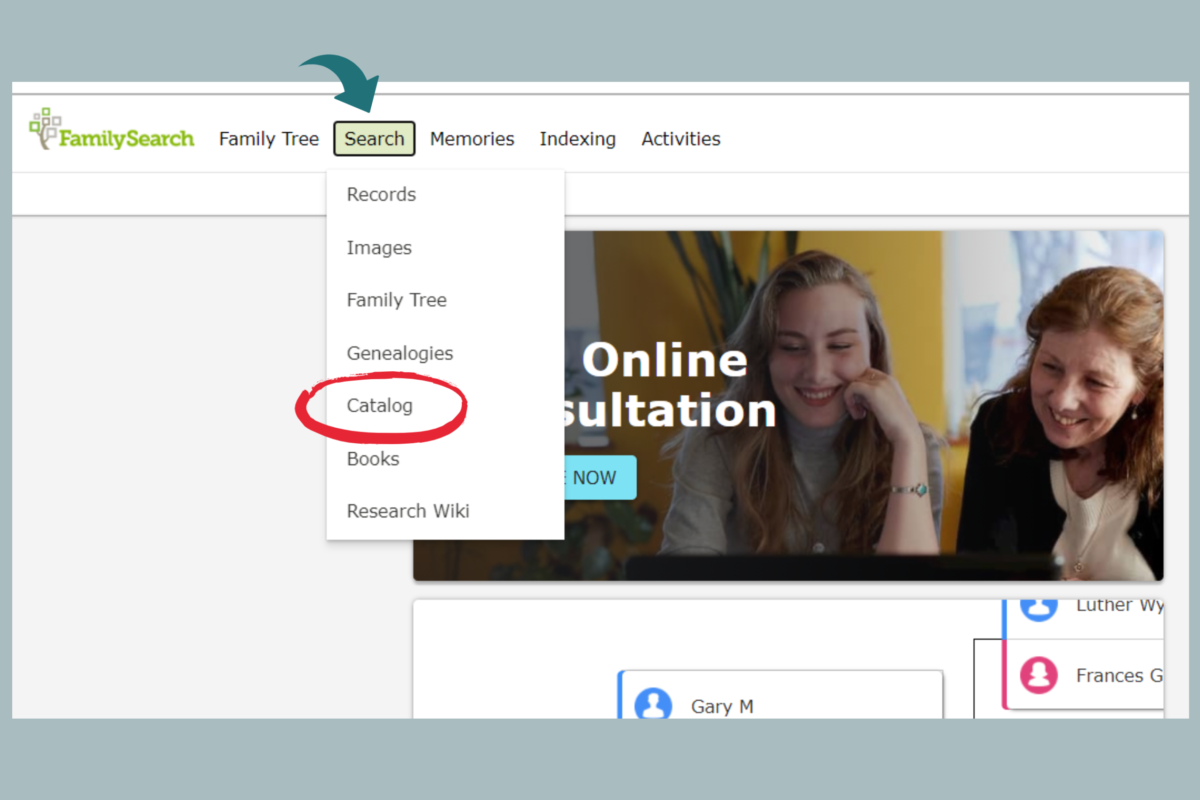
Instructions: Use the following steps to find the records within the catalog: FamilySearch>>Catalog>>State Search>>Census Collections>>Mortality Schedules>>Images>>Records. I’ve included images of each step below to help you navigate to these records.
Limitations: The only limitation to this process is that it takes a little more time, although it is actually a simple and easy search.
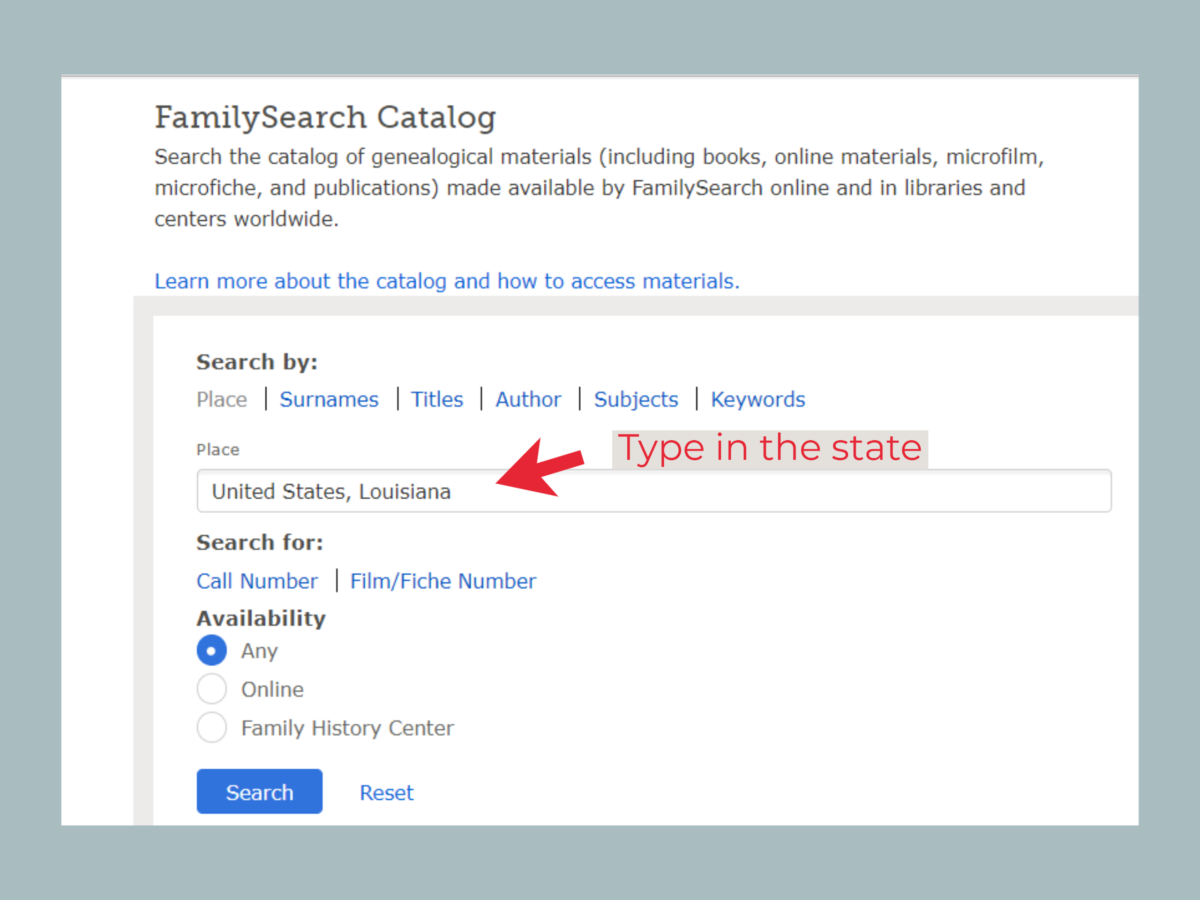
Select CATALOG from the FamilySearch HOME page:
From the CATALOG page, type in the state you want.
A drop down menu will appear and make location suggestions. Select your preferred location from the drop down menu. This ensures that the system recognizes the correct place and returns all the records from that locality. Once you have the correct location in the search field, click SEARCH :
Find the CENSUS YEAR from the menu:
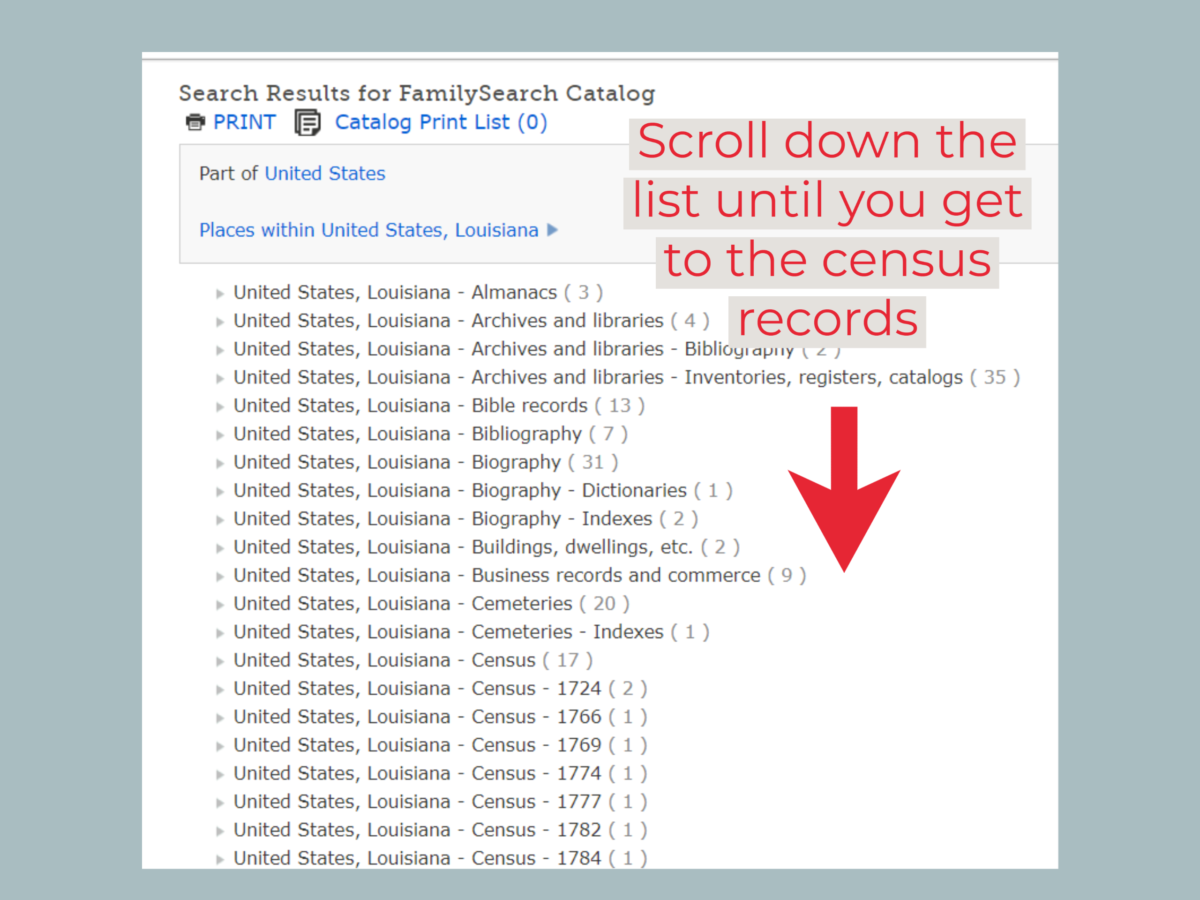
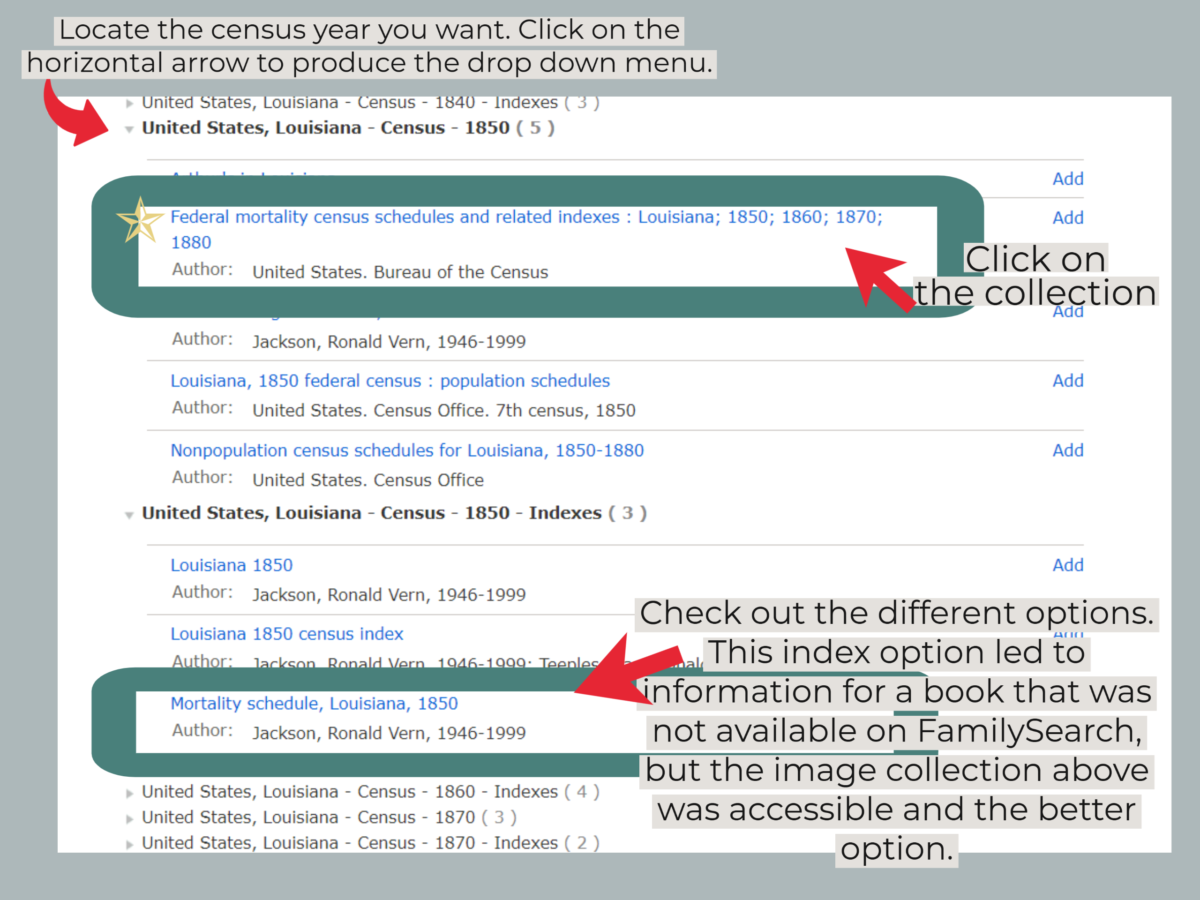
Click on the census collection by year.
Find the MORTALITY CENSUS SCHEDULES from the drop down menu.
Click on that link (in blue):
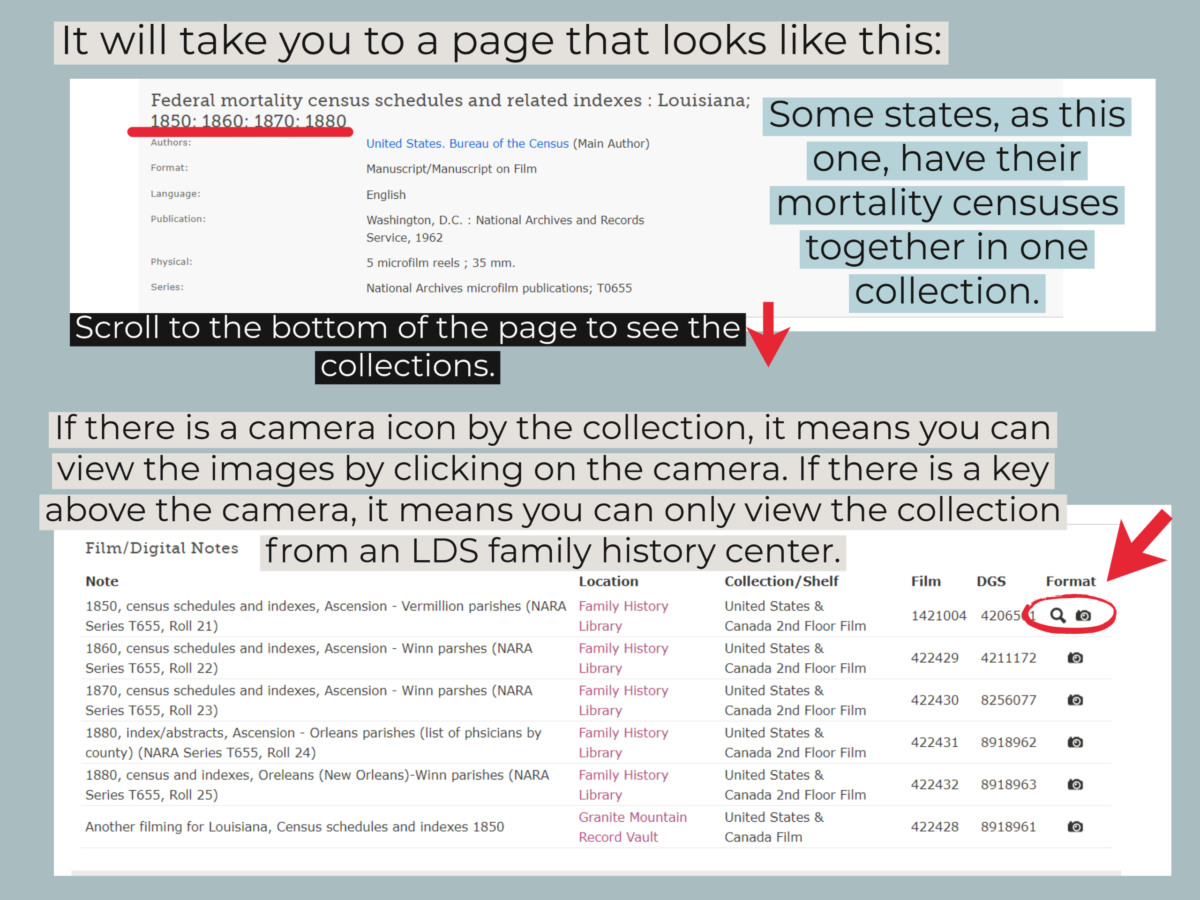
The record link will redirect you to the next page which will show you what records are available.
The records will be listed through additional links. Try the different links on the page to see where they direct.
Here are some options you may come across:
A message that says, “To view this collection online: click here“, indicates that the collection has been indexed and is searchable. Yay! Click on the link to search for the record/image by person’s name and location.
Sometimes there are links to an online book on FamilySearch where the mortality schedule is listed.
Specifically, look for record collections at the bottom of the page. A camera icon next the record set indicates it can be viewed online. A camera with a key over it indicates it can only be viewed at a family history library. A film icon means it is available at the family history library in Salt Lake City, Utah. If this is the case, save the link to that page (create a document for those quick links to come back to) and check back soon. New records are added daily.
Here is a picture of what to look for in this step:
The Image Collection
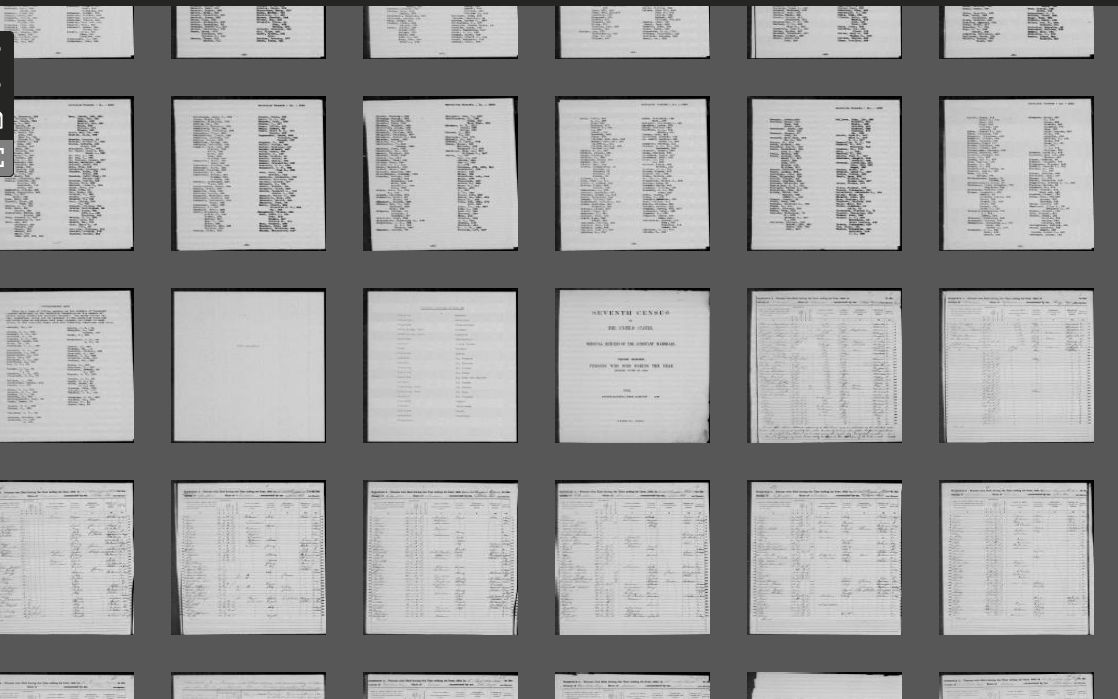
When I clicked on the camera icon above, it opened the image collection. This one (for Louisiana) includes all of the mortality schedules into one record set and a typed index of names at the beginning. You can thumb through those indexes to look for the county, years, and the names of people. Even if your state doesn’t have an index, the records are often alphabetized by county. Scroll through:
Here is an example of the index list from the above collection. It includes the year, name, and page number for the record (which may be different from the image number. If so, look for a page number that is printed on the image.):
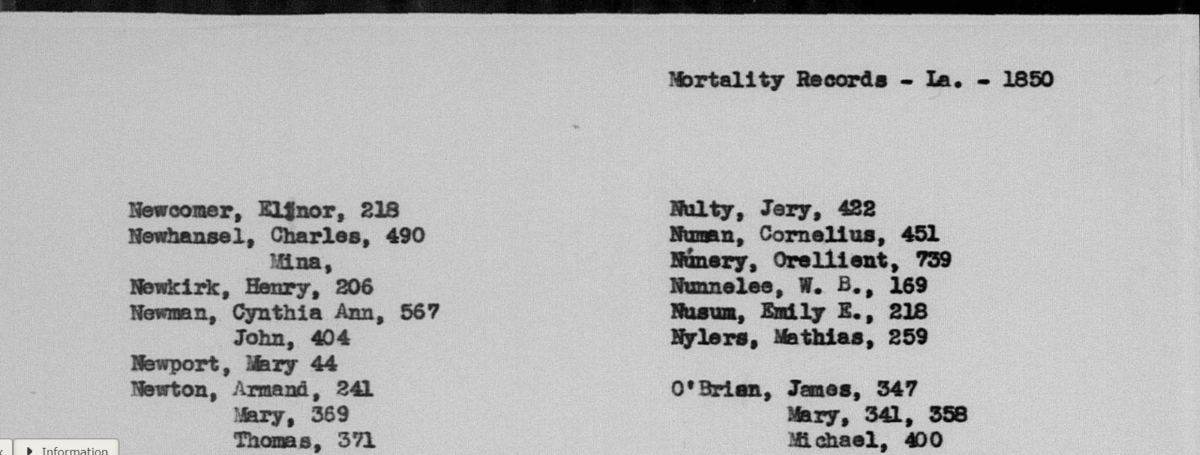
1850 Mortality Schedule, Ascension Parish, Louisiana. Downloaded of FamilySearch.org.
Here is an example of an actual record. It looks just like a census record, right? Because that is, basically, exactly what it is!
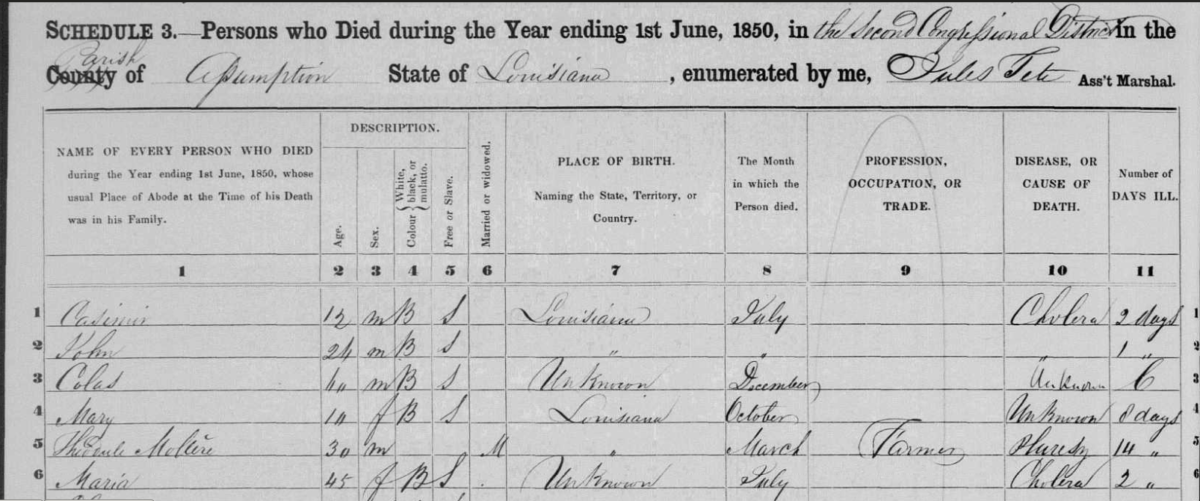
1850 Mortality Schedule, Ascension Parish, Louisiana. Image courtesy of FamilySearch.org.
If none of these resources have the mortality schedule you need, do a simple GOOGLE search for the specific location and year. ( Ex: “Maine mortality schedule 1870”). Every state is different and a quick internet search may offer other online resources.
Additional Ways to Use Mortality Schedules in your Family History Research:
- To find children or babies who may have been born and died in-between census years. Parents’ names aren’t listed, but through surname, parents’ birthplaces, and other clues, you may be able to find that child in a cemetery and determine if they were a child of an ancestor.
- To learn family medical history.
- To gain detailed information about African-Americans. This is especially helpful for researching enslaved individuals as it offers vital details about their life/death, place of birth, and where their parents were born. You may find more information on a mortality schedule than any other record.
- To learn more about all minority groups, where they were from, and what industry they worked.
- To learn about migration patterns in a family by discovering where an ancestor or their parents were born. If a person is listed on the 1850 mortality schedule, it may have been the first record where their birthplace was recorded.
- To learn more about women and children not recorded on previous records. Maybe there is someone that should be in your tree but has never been discovered. Peruse the 1850 mortality schedule and look for family surnames. Only head of households were listed on the 1840 census, so most women, children, and even young adults did not appear in those records. The 1850 mortality schedule offers pertinent information for those whose names may or may not have appeared on any other document.
- To learn more of the difficulties that your ancestors endured in their life. These records can paint a broader picture and help you learn more about your ancestor’s story. Did they die from an accident, a plague, a fire, tornado, etc.? You may be able to use the information you discover and learn more through a historical search or newspapers at the time. What was life like for a county that was plagued by cholera? What were the details of the tornado that hit their town? How did the people move forward after such events? You can learn a lot about the significant events of your ancestors’ lives through the accounts of others and in newspapers. These details can also help you to understand what family members of the deceased might have experienced.
Worth the Effort?
It may seem like the odds of finding a family member in one of these records are small, but you may be surprised. Do a quick scan of your family tree and look for individuals who may have died in the year before a census.
I found many candidates as I did so. I was so amazed and excited by the information I discovered. I knew right away I wanted to do this tutorial.
Have you ever found any gems through mortality schedules? I would to hear if this process helps you to find something new.


