How To Find Your Ancestor’s Photos on Family Search
Seeing an ancestor’s photo for the first time is a magical thing- especially if you have searched and hoped to find one. I have personally been on a mission the last few years to find as many photos as possible of my progenitors and it has been a wonderful labor of love. It has taken some time since I started out with NONE but I have definitely found success! My hope is that I can share some tips to help you do the same and also save some time in the process.
This post is #1 in a 10 part series I am working on to show you the best resources for finding family photos with ease- and certainly with reward!
Since Family Search is free and is built as a collaborative SHARED FAMILY TREE, it is a great place to start your search. In this tutorial, I will show you two ways to quickly navigate the site and find photos of your ancestors.
NOTE– Make sure you have already created a free family search account and connected to the tree. I have another tutorial on that HERE if you need help getting started. Once you have set up your tree, come back to this post and follow the steps below.
Method One:
From the home page on Family Search, click on Family Tree.
(see photo below for example)

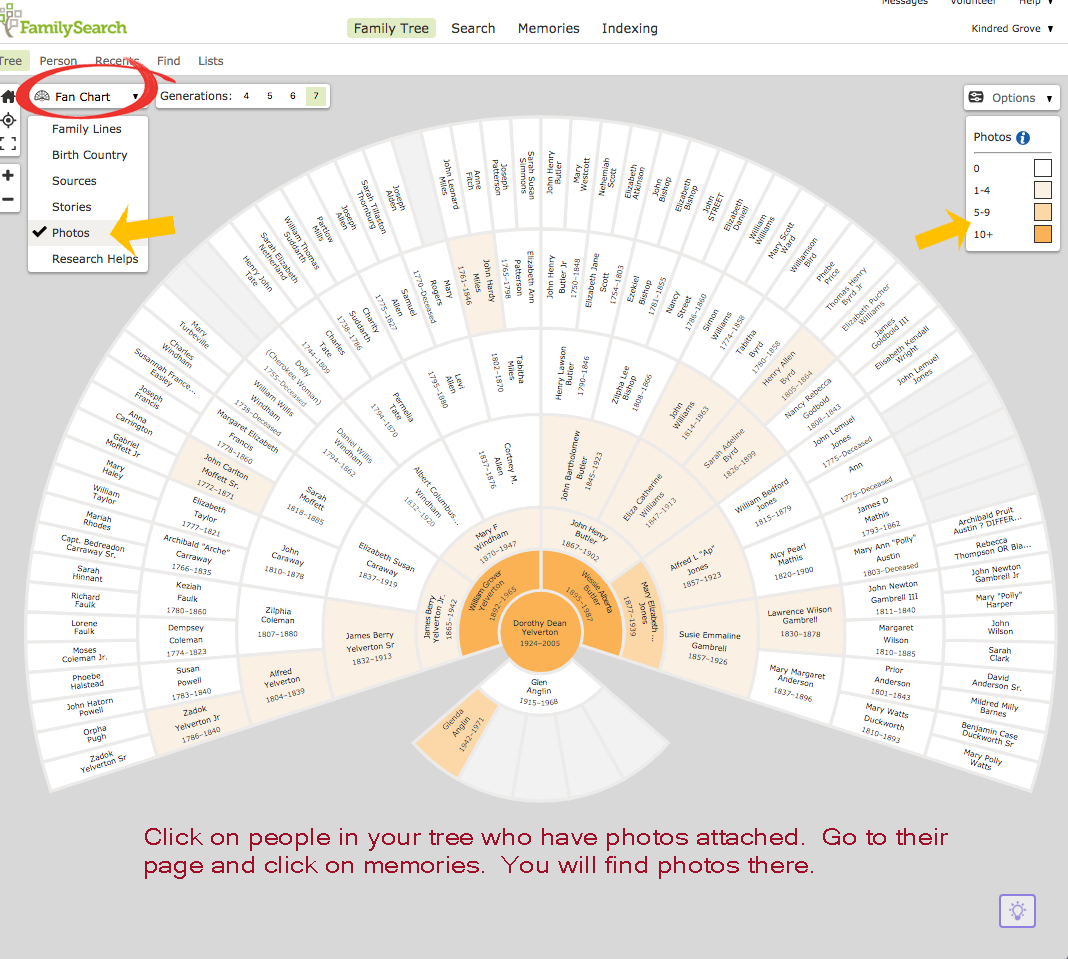
This will take you to the tree. In the TOP LEFT corner, make sure to SELECT:
FAN CHART
7 GENERATIONS
PHOTOS (in drop down menu)
Those with photos attached will appear light to dark orange. The more photos attached to a person, the darker they will show up in the fan chart.
FOR A FULL TUTORIAL ON NAVIGATING THE Family Tree & FAN CHART, GO HERE.
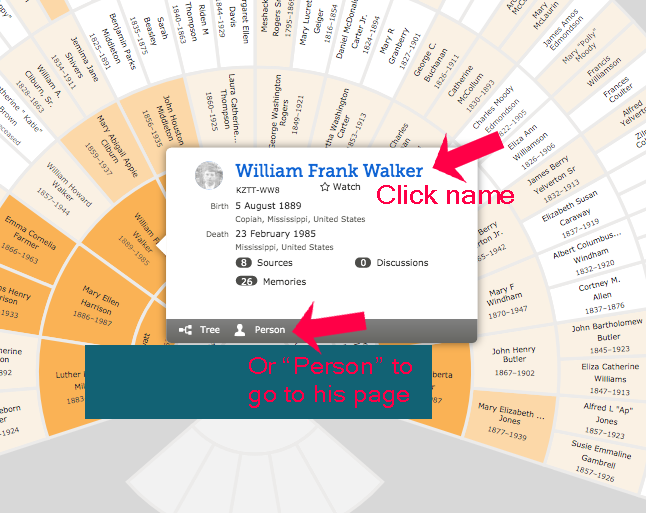
To see what photos are attached to that person, click on their name right there in the fan chart. It will bring up a description tab (see photo below).
I like to RIGHT CLICK on their NAME or where it says PERSON- and then click OPEN IN NEW TAB. This isn’t necessary but does keep your fan chart open and takes you to a new page to view the person page. I just find this easier. But either way, go to the PERSON PAGE.
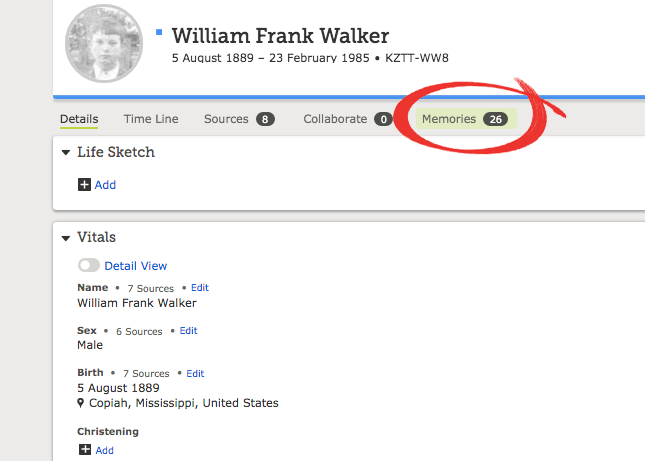
Once you are on the PERSON PAGE, look for the MEMORIES tab. Click on that.
Now you can peruse through the photos (and stories too). Don’t forget to click on MORE if it is displayed in the bottom left corner (see arrow in photo below) to open up ALL of the pictures in their memories.
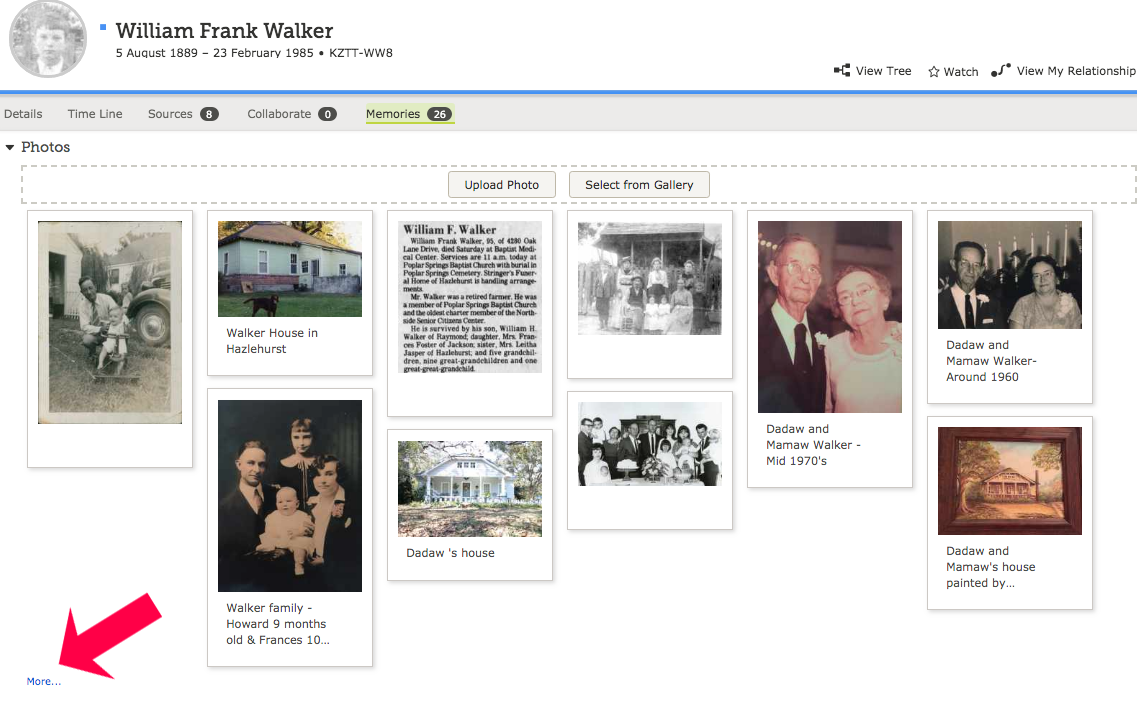
And that’s it for the first method. Just repeat as desired with others in your tree!
METHOD TWO: From the HOME PAGE, Click on MEMORIES and select OVERVIEW from Drop Down Menu.
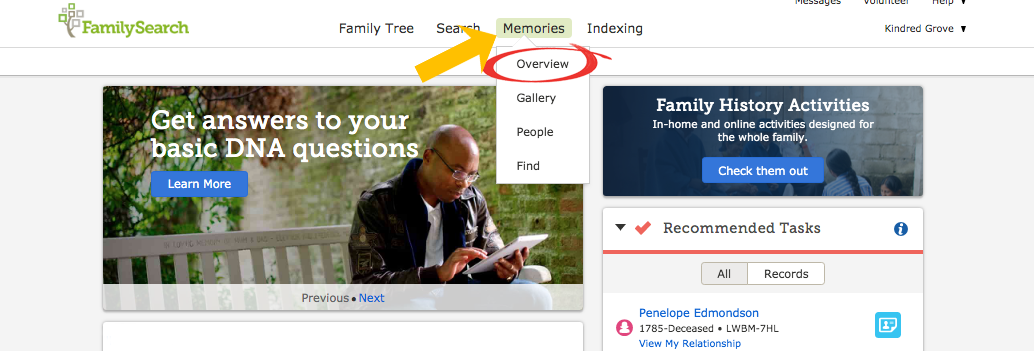
This will take you to the MEMORIES page where you will have several options for adding photos yourself etc., but for this tutorial, we are going to scroll down the page to the section where you can find photos others have uploaded.

Go to the panel- Discover the memories others have shared about your family. Click on SEE MORE PEOPLE.
Also, note that any time you want to WATCH a person, you can click on the star and you will be notified via email anytime someone adds or makes changes to that profile.
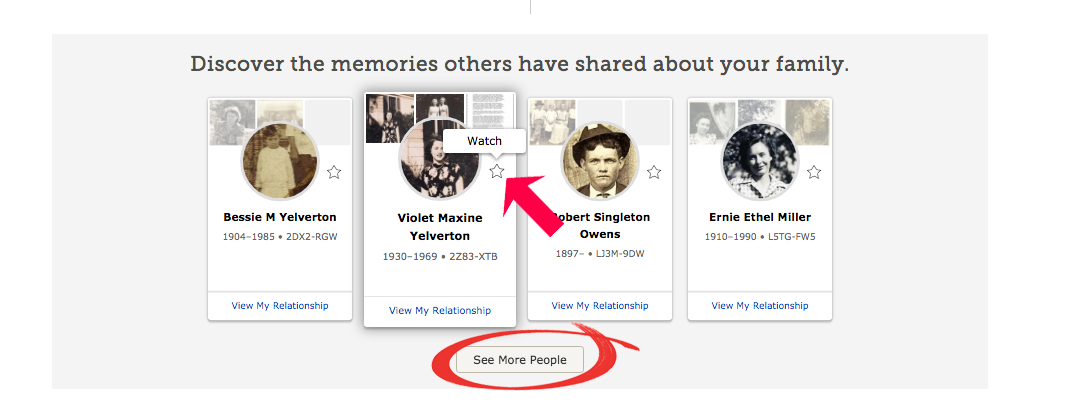
Just look at this beautiful album of memories to explore! These are your “close family members” which may include parents, grandparents, siblings, aunts, uncles and cousins. These are only deceased individuals as Family Search keeps living people private and confidential.
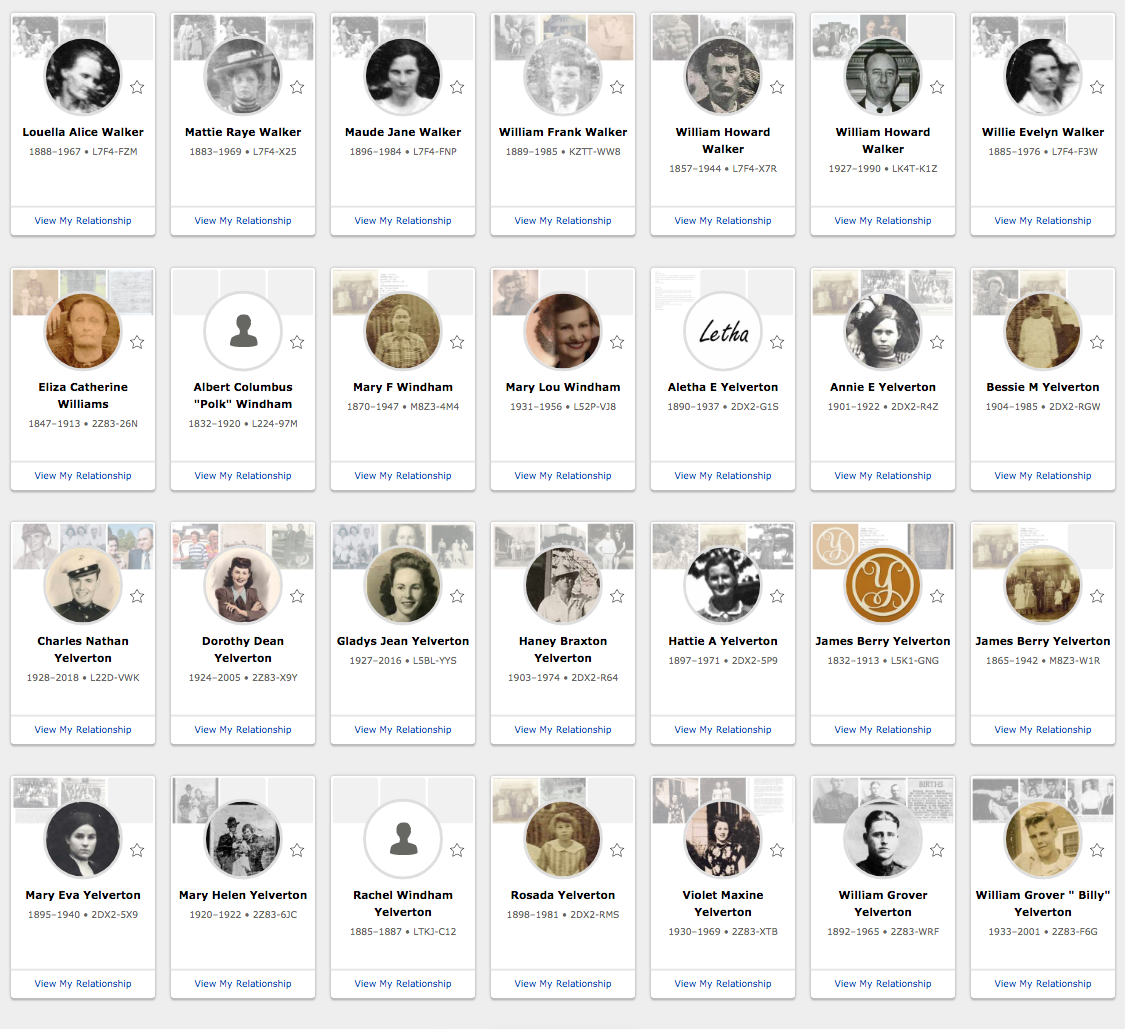
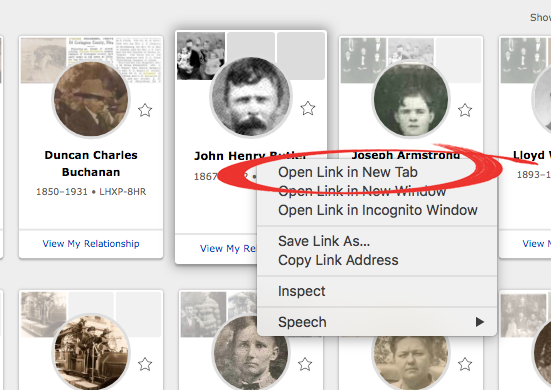
To look at the photos, just click on the tab you want. Again, I prefer to RIGHT CLICK and select OPEN IN NEW TAB so that I don’t lose my place on the memories page. This will take me to the individual person’s memories for viewing.
Another option is to search within this menu by name. Just type in the name in the top right-hand corner. This will show you what is available for that family.

And that’s it for method two. It’s pretty easy and fun to reap the fruits of other people’s generous acts of sharing! I would also like to add that if you do have family photos in your posession, please upload them and do the same for others. There will be many grateful for your willingness to share the wonderful treasures of family photos!
Please let me know if you have any questions! Happy hunting!


